5 Steps of Creating Online Class You Should Know
- Step1. Instructional Design
- Step2. Create A Prototype of The Online Class
- Step3. Collect and Organize Materials
- Step4. Screen Recording
- Step5. Edit and Composition
Step1. Instructional Design
Every professional teacher knows the teaching design, the key points, difficulties, teaching methods, processes and so on. But as a preparation for creating online class is much harder than traditional class, you must write a manuscript (similar to the lines of a movie) to record audio, and you must design a sub-mirror table (similar to a movie script) in order to take screen recording.
Step2. Create A Prototype of The Online Class
Select a relatively complete teaching unit, and create a prototype of the online class. Through the prototype design, determine the overall style, interface, navigation style, material specifications, and script content of the network courseware.
Step3. Collect and Organize Materials
- When you get manuscript and the lens chart, you can begin to collect videos and audio .
- Appropriate pre-processing can be performed on the material. For example, crop the picture or adjust the color, brightness, contrast, blur of the picture can make the focus stand out.

Step4. Screen Recording
- Screen recording is the easiest recording method. The content to be told is directly opened in the Mind Mapping or Powerpoint, the computer screen and the lecture audio can be directly recorded at the same time.
- Online courses audio should be recorded before video. Because adjusting the playback speed of the video does not greatly affect the visual effects, but adjusting the playback speed of the audio will cause abnormal tones.
- Record video in segments by record software, you can follow the manuscript and sub-mirror table , and record the video shot by shot like a movie.

Here we selected 3 screen recording software programs to recommend for the newer:
Step5. Edit and Composition
Finally, we reached the most technical step of how to make online class, there are many softwares to satisify the simple video editing needs for the teachers, here we take BeeCut as an example.
BeeCut is a professional editing tool that lets you make and edit videos. You can split, crop, trim, add effects, texts, watermarks, and overlays and more. With this feature in hand, you can easily create online class video in high quality .
Here is how to do using this tool:
- Download and install the app on your computer. Afterwards, launch it and put the video and audio to the track.
- Clipping to remove wrong parts: you can apply the cut tool to area delete clips on all tracks, you must first select the clips to be deleted before deleting. In order to ensure the accuracy of the selection, the time axis can be adjusted to a relatively large state.
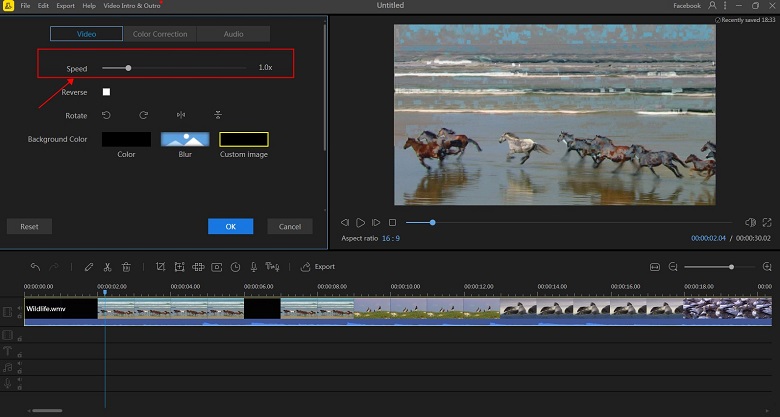
- You can adjust the speed of the video by double-clicking the video of the track

- Add appropriate video transition effects, background music, etc.You can also watch related tutorial videos by clicking on the picture below.
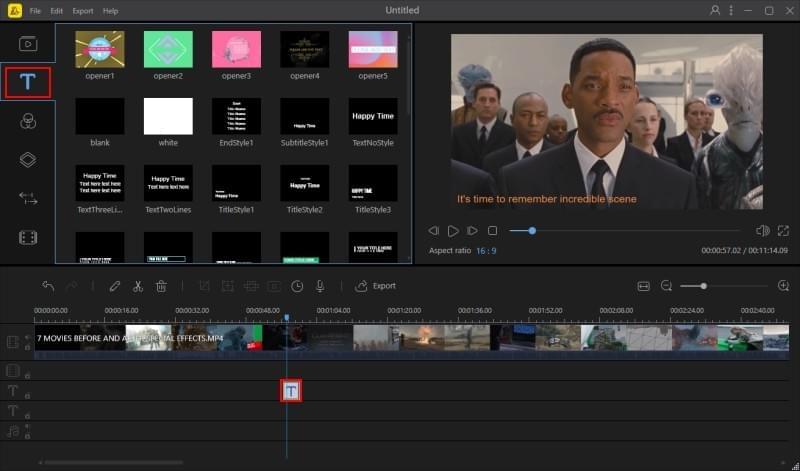
- After this, add the video to the timeline. Then, click the “Text” tab and choose the template that you want to use. Add it to the timeline and customize it by changing the content, font size, style, color and so on.

- Once this is all set, click “Convert” and then the program will start to process your video. Click the “Open” button on the main interface, then you will be directed to the output folder.
Conclusion
Creating online class is a tedious task. It requires patience and meticulousness, hope everyone can produce excellent online class video works.


Leave a Comment