Best Green Screen Editors
For Windows Users
1. Via VSDC
For the green screen editing task, you can opt for this tool called VSDC Video Editor. This Windows editing tool cater to those beginners and experienced users that are on a budget. Aside from the chroma key function, this video editor also offers some of the essential video editing functions like speed adjustment, text overlay, split/merge, brand overlay, adding of effects etc.
To remove green screen with this tool, here’s what you need to do.
- Launch the program and import the green screen video that you’ll work on and move it into the timeline.
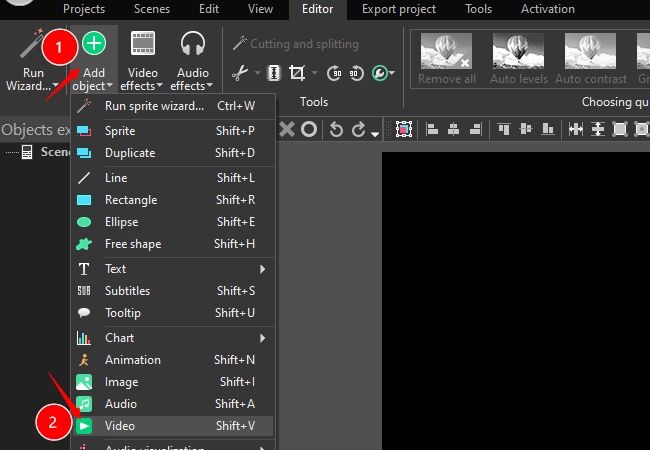
- Next, is to click “Video effects” from the menu and then select “Transparency and Background remover”. A new later will be created at the timeline with the name “Background Remover1”.
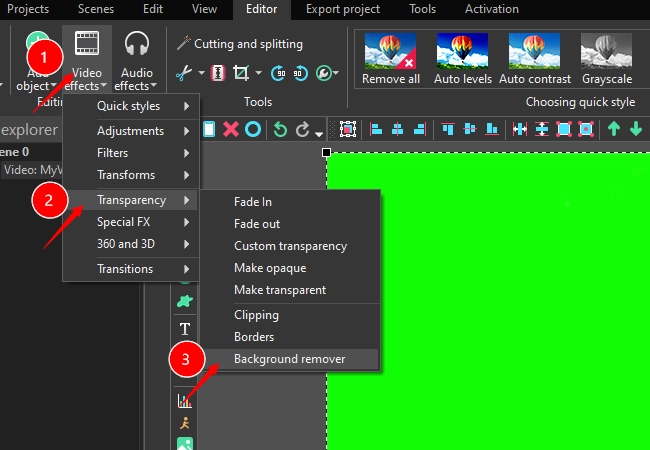
- After that, do a right-click at the new layer to open the properties window.
- Now under the “Background removal” settings look for “Chromakey color” click the dropper and click the green part of your video.
- To improve the green screen effect, just go to Properties and Basic effects windows to adjust the brightness, chromacity levels, etc.

2. Via BeeCut
The next green screen editor for Windows is this reliable program called BeeCut. This video editor has a neat and easy to use interface, yet capable of making stunningly awesome videos. It also has the easiest to use chroma key function, which they call “Green screen cutout”. No need to set a lot of things, simply upload the video click the said function and it’s done. Aside from deleting green screen background, this tool also provides all basic video editing functions like splitting, zooming, cropping, rotating, adding of effects and transitions and the likes. Another interesting function of this tool was its Speech to Text conversion and TTS vice versa.
To use this app for green screen editing, here are the steps.
- Install BeeCut by downloading it from the download link provided.
- Open the program and select the aspect ratio that you want for your project.
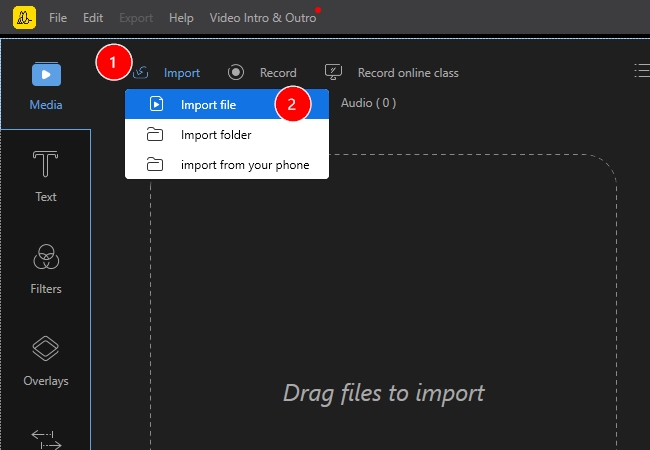
- Next, is to import the video clip that you”re going to use, just click “Import” and then select “Import file”. Browse for the video file and open it.
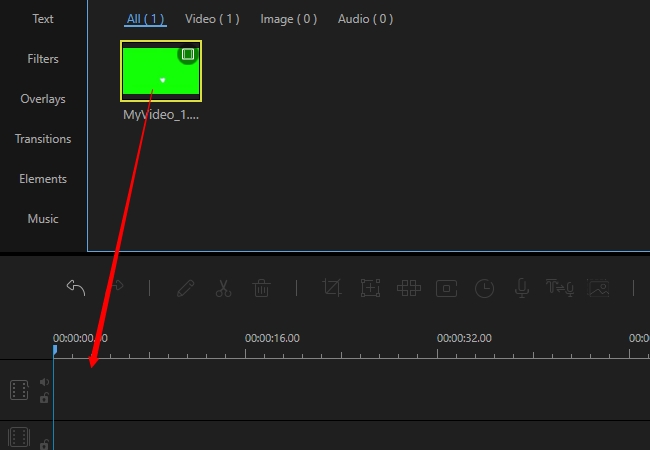
- After that, drag the video clip into the timeline.
- Now, click the “Green screen cutout” function. Another window will then appear.
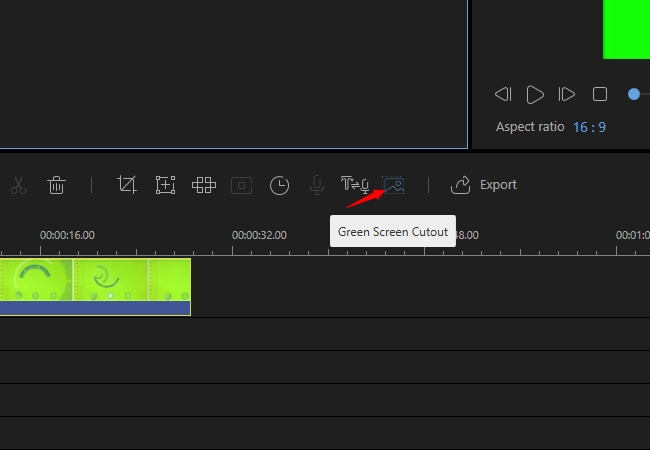
- Click the dropper icon and then click the green portion of the video from the preview panel.
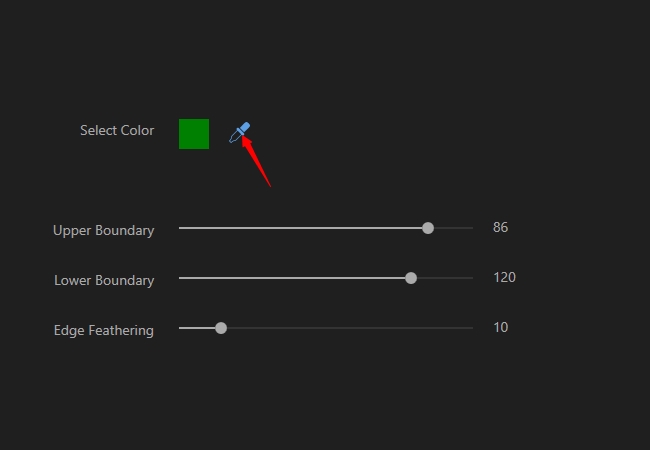
- You’ll notice that the effect is not perfect yet, so all you need to do is to make some adjustments, such as the upper and lower boundary, and edge feathering.
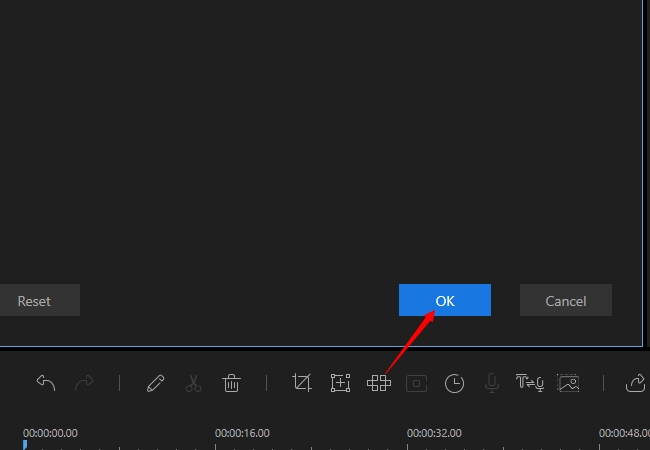
- When satisfied with the appearance click “OK”.
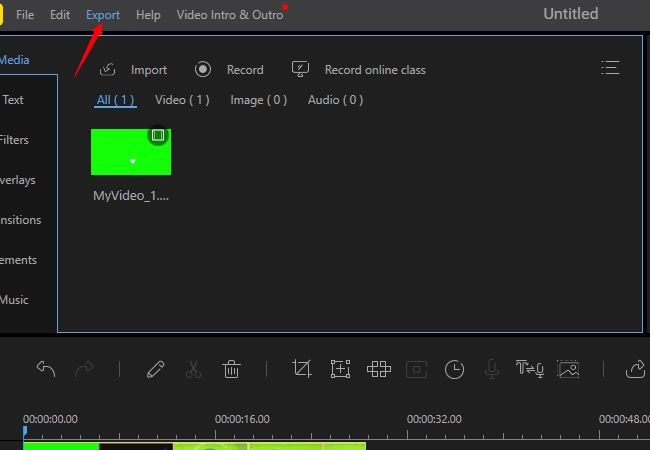
- To save the changes made, click “Export”, choose the format you prefer as well as the title and then hit the “Export” button once again.
For Mac Users
1. iMovie
If we talk of green screen editing on Mac OS then the most accessible tool is none other than iMovie. This built-in video editor may seem to be a basic editor but in fact, it already offers a green screen function to create a transparent background effect. As we all know that iMovie is also equipped with various video editing functions, it means you can further enhance your video after getting the green screen effect. Some may think that it’s too complicated to do, but honestly, it’s not. To do this task simply follow the guide below.
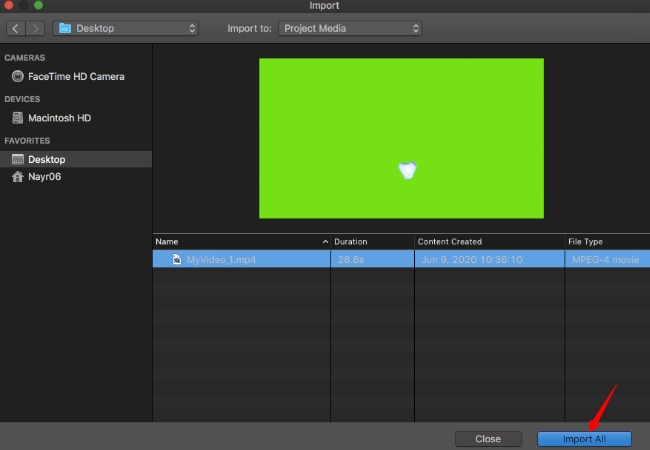
- Launch your iMovie and start uploading a video file by hitting “File” and then “Import”> “Movies” select a video file and open it.
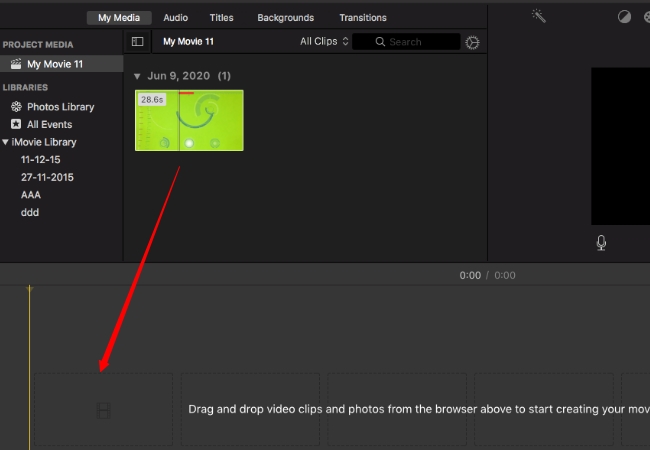
- Once uploaded, move the video into the timeline where you can start the editing.
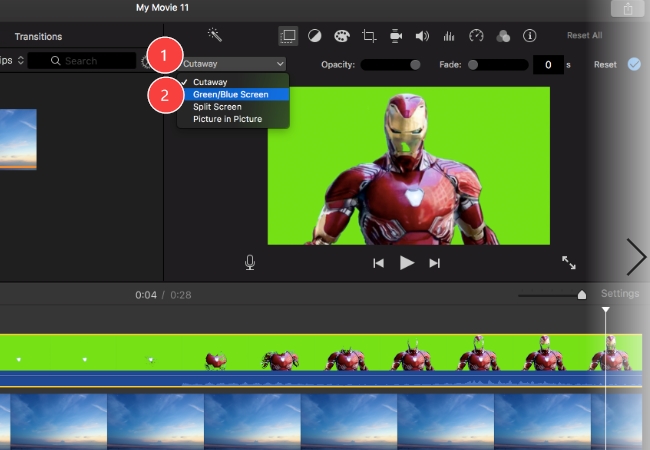
- To apply the green screen effect, just click the video and then hit the “Video Overlay Settings” located at the preview window.
- Now, select “Green/Blue Screen” and the green screen will disappear immediately.
- To polish the effect, you can utilize the clean-up and softness tool.
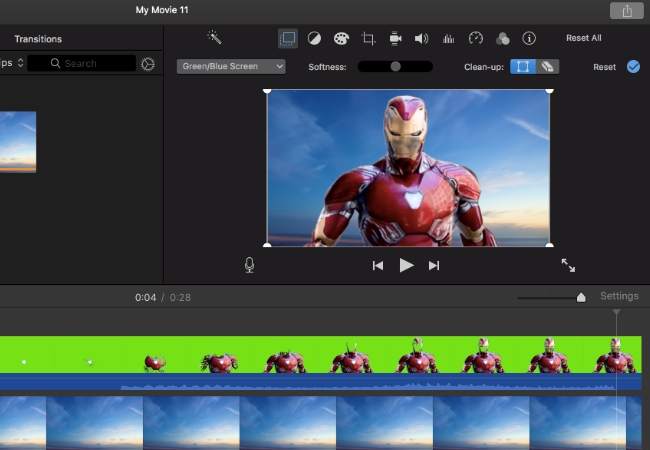
- To add a new background simply place it below the green screen file.
2. Via Instant Alpha
Another built-in tool that can also serve as a green screen editor for Mac OS is a function called Instant Alpha. This function is available on Preview which we all know to be an image viewer and PDF viewer in one. Unlike the other tools above, this app works well by removing background of any images. To effectively use this program here are the steps to do.
- Open your Mac device and open Preview.
- Next, is to select the image to process and open it.
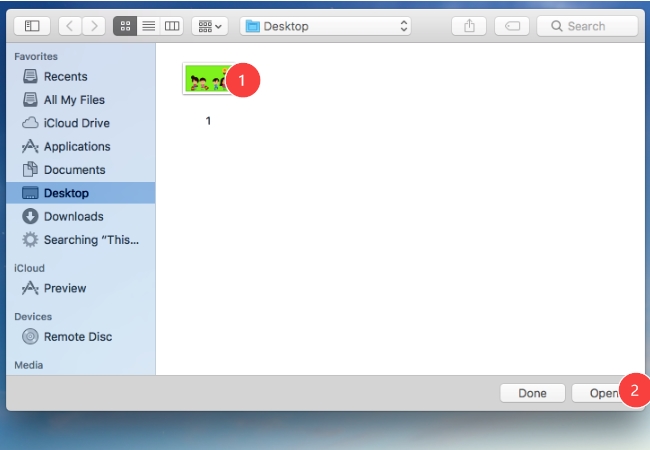
- After that, click the pen-like icon located at the upper right portion of the app.
- To remove the background, you need to click the Instant Alpha function that is represented by a magic wand.
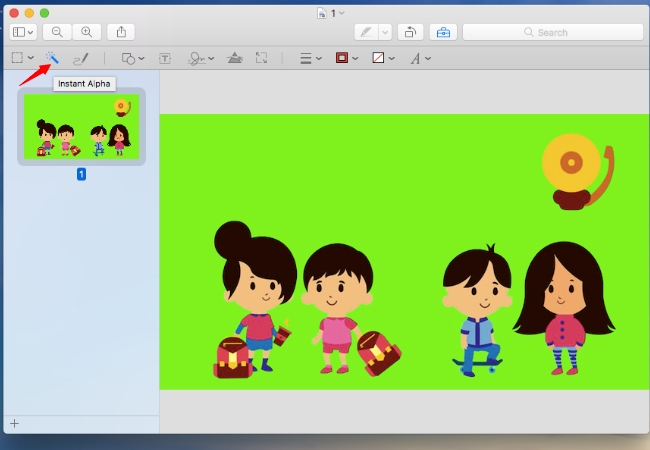
- Click and hold this function and drag it into the background that you wish to remove.
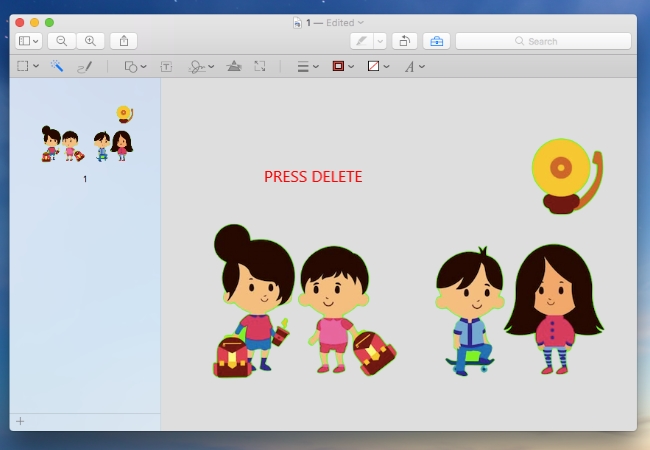
- Upon releasing the mouse the unwanted areas will be highlighted. Now, press delete to finally remove the highlighted portions.
Conclusion
Now every time you need to remove green screen from a video or have that chroma key effect you can easily do it by picking one of the programs above. While if you’re looking for the easiest green screen editor to use then better opt with BeeCut. For it can provide you with a green screen effect with just a few clicks.


Leave a Comment