3 Popular Tools to Reverse a YouTube Video
Use BeeCut
The first program you can use is called BeeCut. This is one of the most well-known video editors which you can utilize to reverse video with its editing functions. With that, you can easily reverse your video to play it backwards. Aside from that, users can apply effects to the reverse videos such as filters, overlays, texts, transitions and elements. What’s more, users can have this program on their Windows PC and iOS devices. To understand the process of how to reverse a YouTube video using this software, see the detailed guide below.
- Open your computer’s browser and visit the program’s official page to download the installer. Then, install it on your PC.
- After the installation, launch it and then select the aspect ratio you want to use.
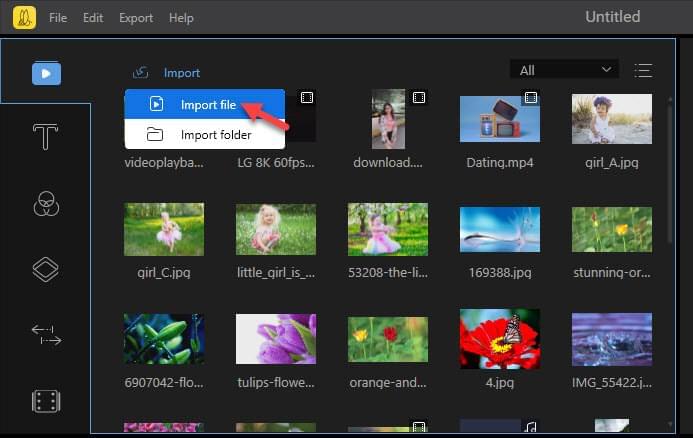
- To upload files to the tool, simply hit “Import” then “Import file” or drag and drop the files to the Media area. Afterwards, add them to the timeline.
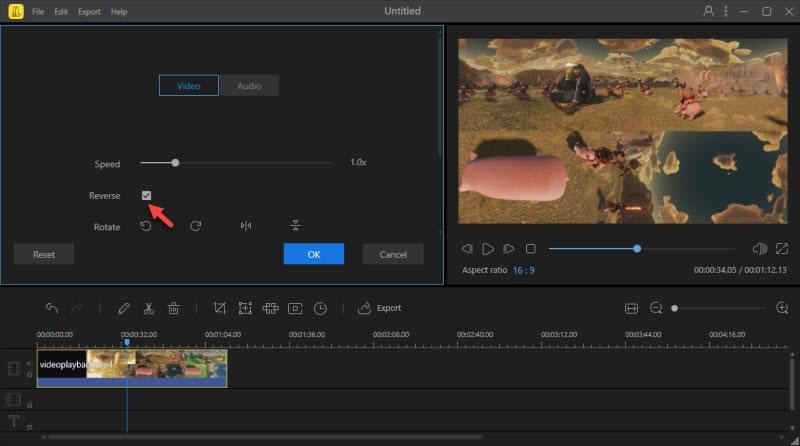
- Next, double click the file on the work area to view edit functions or highlight the file and then hit the “Edit” icon at the top of the timeline. Check the “Reverse” option to start reversing the video.
- Lastly, click the “Export” icon to save your video.
Use Kapwing
An alternative program that can reverse a YouTube video online is called Kapwing. It lets users replay the movement on a certain video backwards. Furthermore, this program is an online application that you can use on your computer’s browser. Make sure that you have a stable internet connection when you use this app. Also, users can upload videos from a device or paste the link of the video on the box. Here are the steps on how it works.
- Visit the main site of the program on your browser.
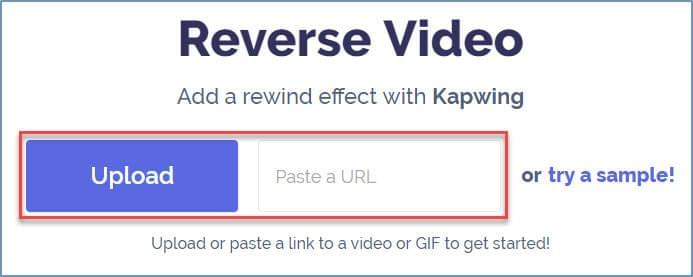
- From there, hit “Upload” or paste the URL in the box to add files to the program.
- Once uploaded, the video will start to process.
- After that, change or reverse speed, trim video, add a custom watermark and mute video if you want to.
- Hit the “CREATE!” button at the bottom left corner of the program. Lastly, download the reverse video.
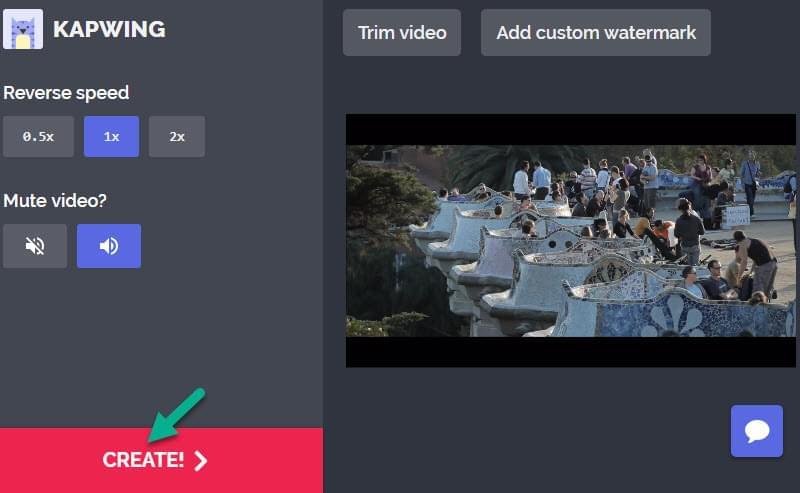
Tips: Though you can reverse a video with this program for free, there is a big watermark in the finished product.
Use Ezgif
Another program that can play YouTube videos backwards is known as Ezgif. Similar to Kapwing, this program is a web-based tool that you can use without installing any software on your device. It has a clean interface which enables you to reverse video in just a few clicks. Moreover, it supports several file formats like MP4, MPEG, MOV, FLV, 3GP, AVI and so on and so forth. However, users can only upload videos up to a 100 MB file size. Here is the procedure on how this tool operates.
- Open the browser on your device and go to their official site.
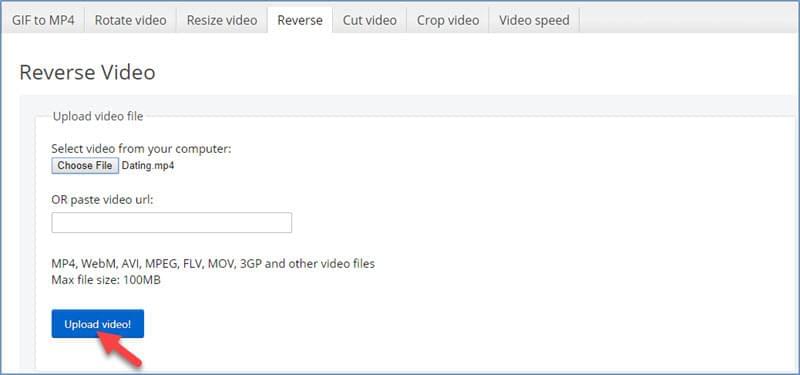
- Upload a video by clicking the “Choose File” button and then select files from your computer. Or paste the video URL on the box and then hit “Upload video!” Make sure that the video is less than 100 MB.
- Put a checkmark on the sound options if you want to mute and reverse the audio.
- Hit “Reverse video!” to start reversing the video.
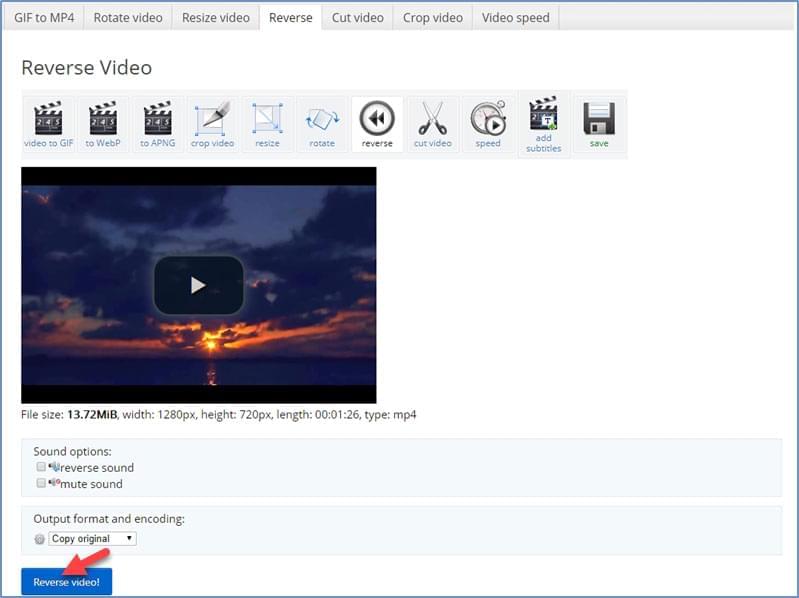
- Once done, hit the “Save” button.
Conclusion
So all three of these tools can help you reverse a YouTube video. All of them have different features for reversing a video which you can share on your YouTube channel. Meanwhile, the online tools have their limitations in file size and leave a watermark on the output video. However, BeeCut lets you upload files with any size and length. Also, it has various kinds of useful functions that surely users need to use while editing a video. For example, you can also use it to split, crop, merge, add watermark, create PIP video, add professional filter, element, overlay, transition effects to video, etc.


Leave a Comment